By utilizing chatbots, you can address your customers’ inquiries outside of regular business hours, assist them during the purchasing process, and create potential leads for your marketing team. Learn how to integrate a chatbot onto your WordPress site to improve your customer communication.
How to install ChatBot on your WordPress site
Connect ChatBot to your WordPress site in a few simple steps and open an additional communication channel for your customers.
-
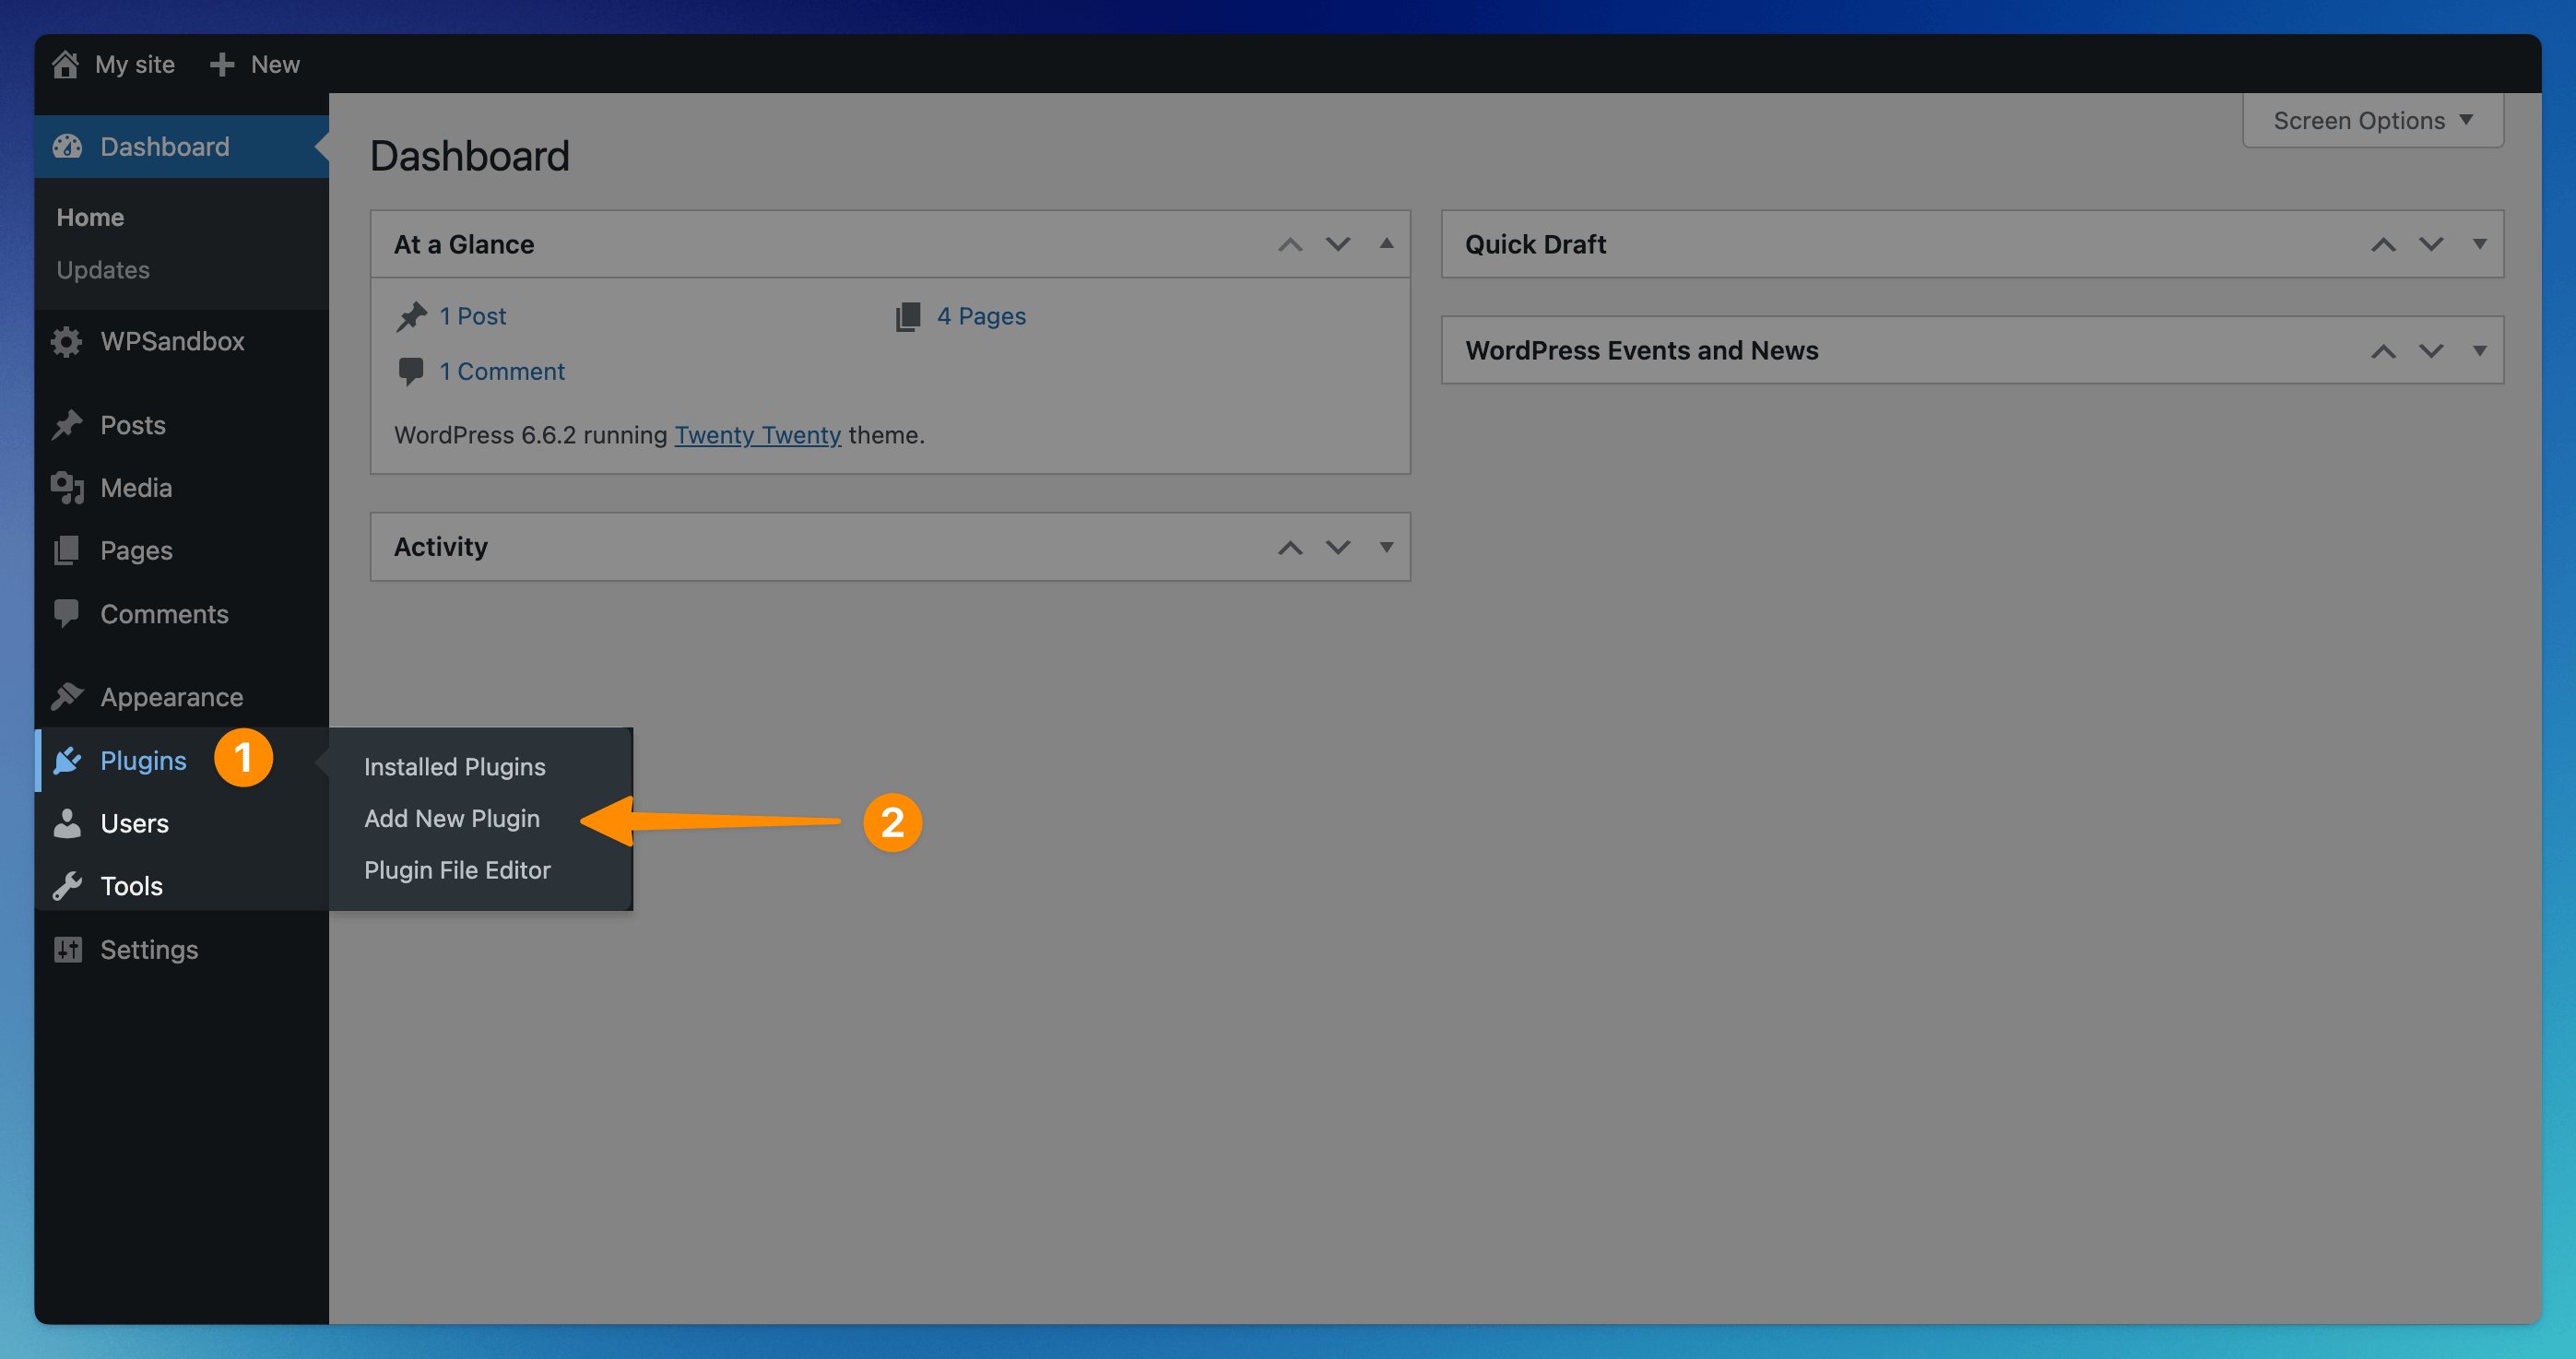
In your WordPress Dashboard, click on the Plugins (1) section and choose Add New Plugin (2) from the list.
-
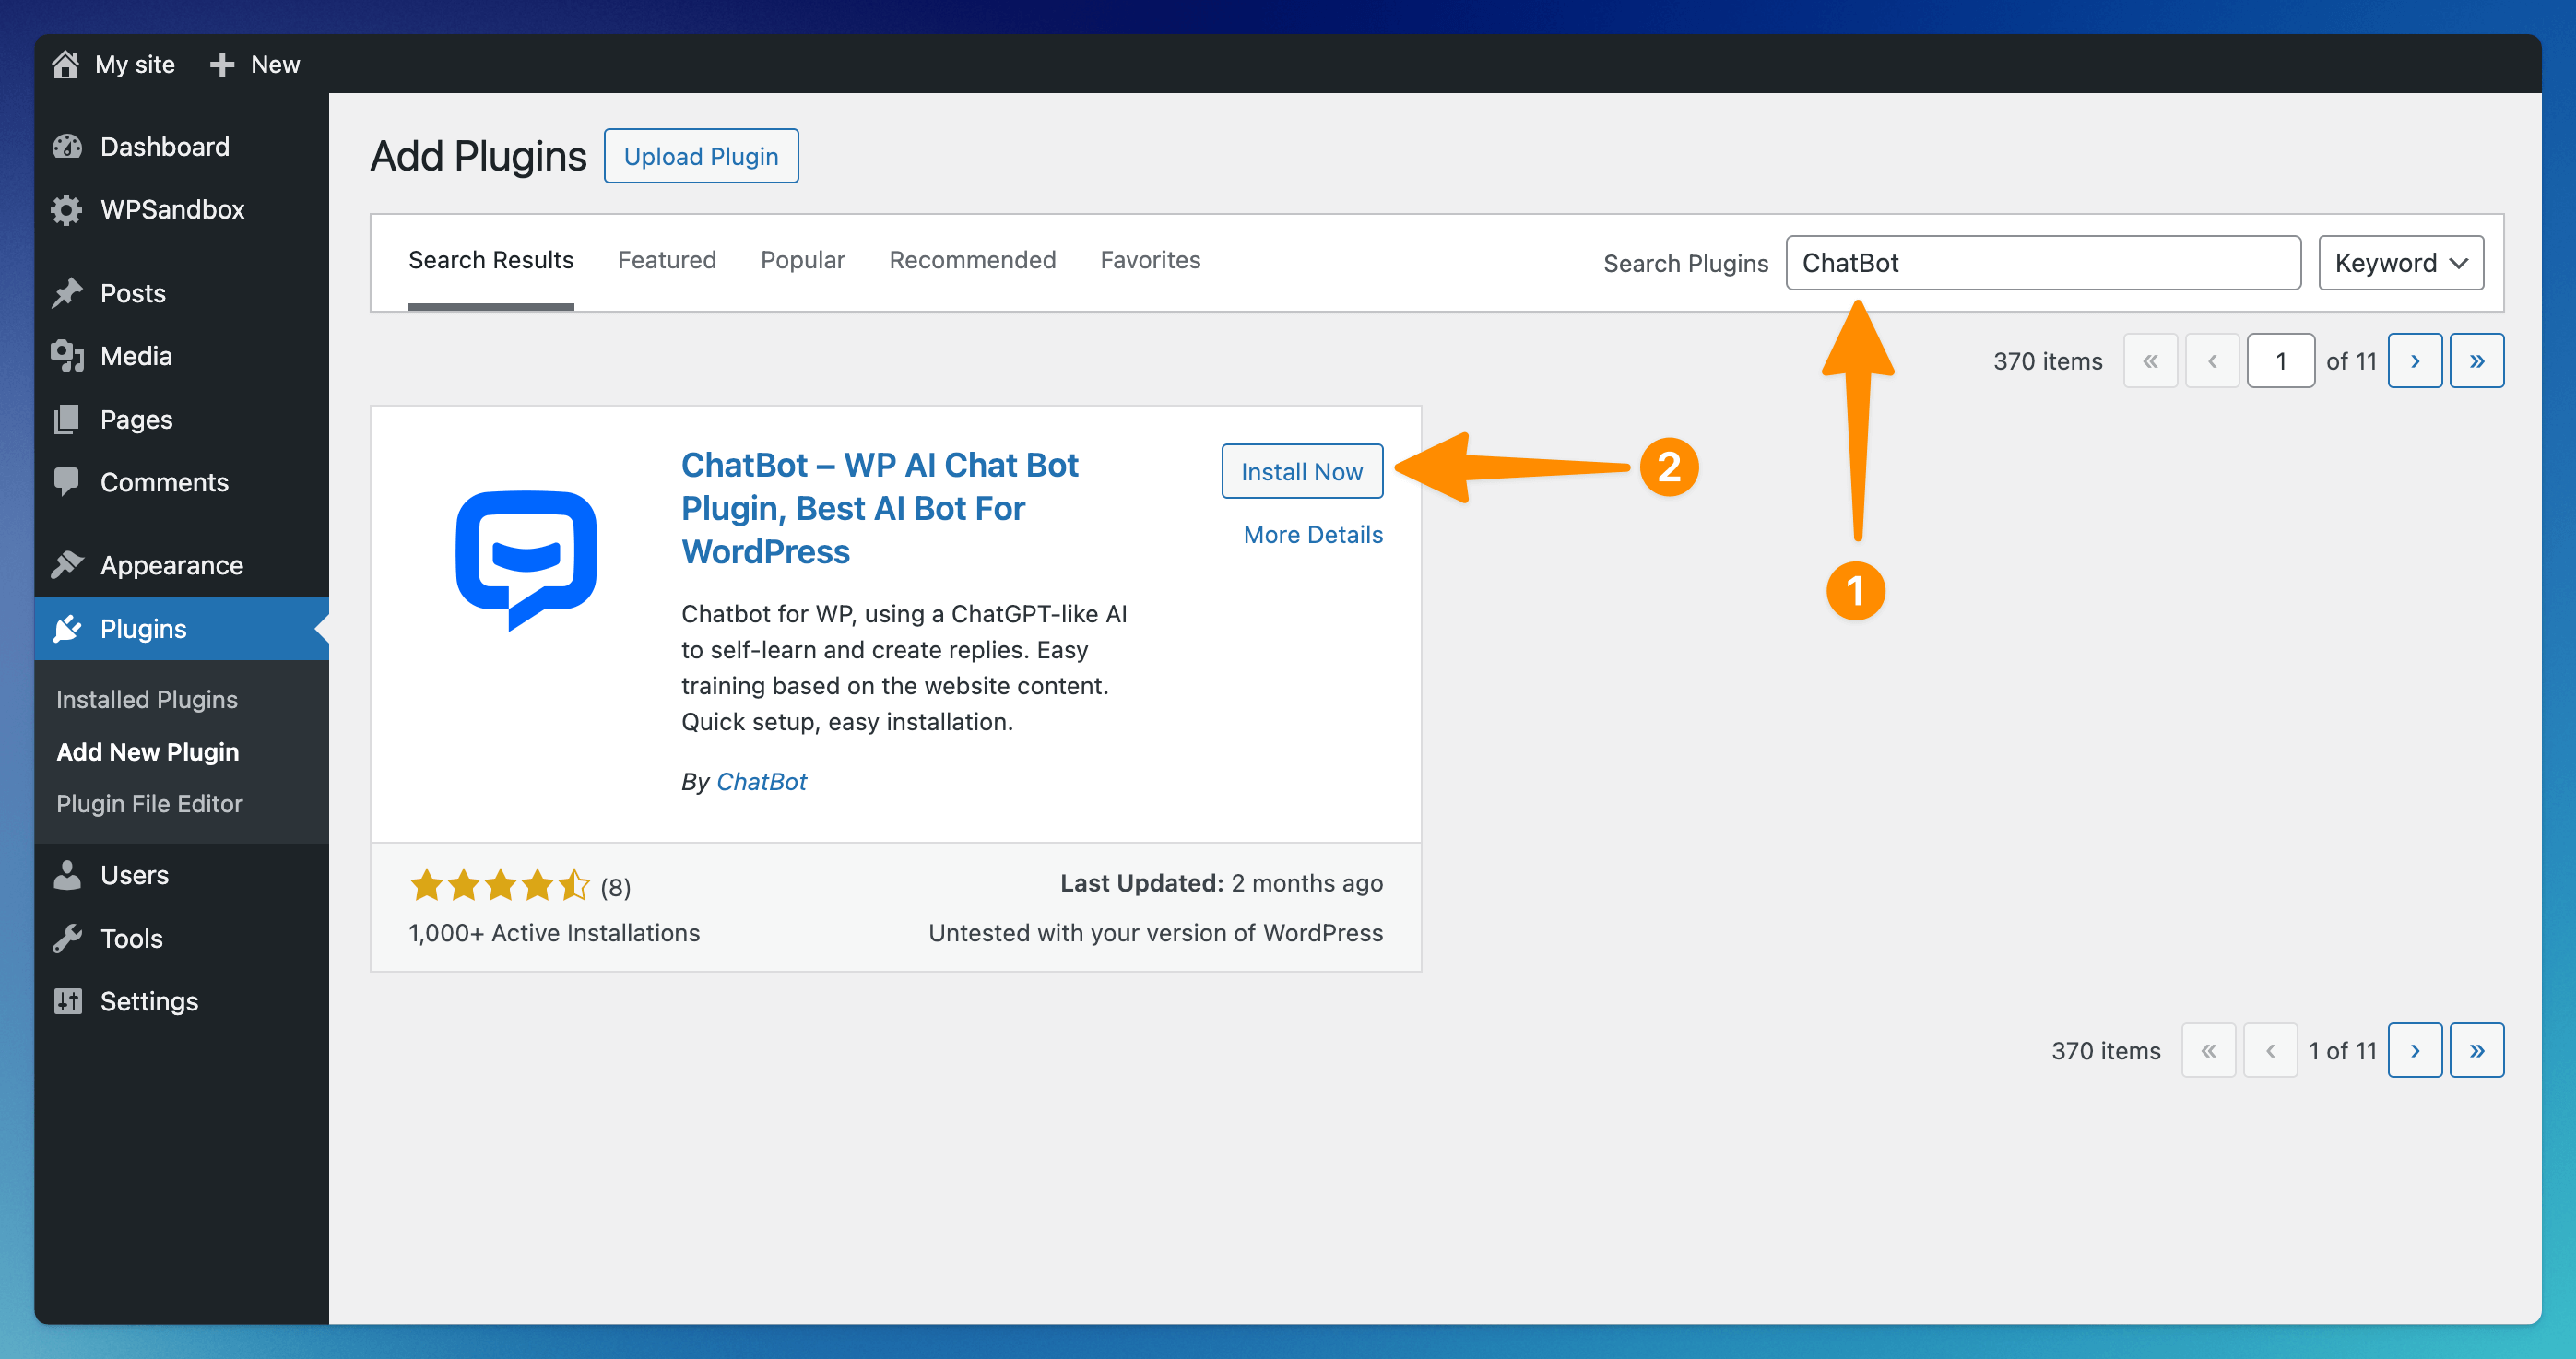
Type ChatBot in the search bar located on the right (1). Find ChatBot.com – WP chat bot plugin for WordPress on the list, and click on Install Now (2) to proceed.
-
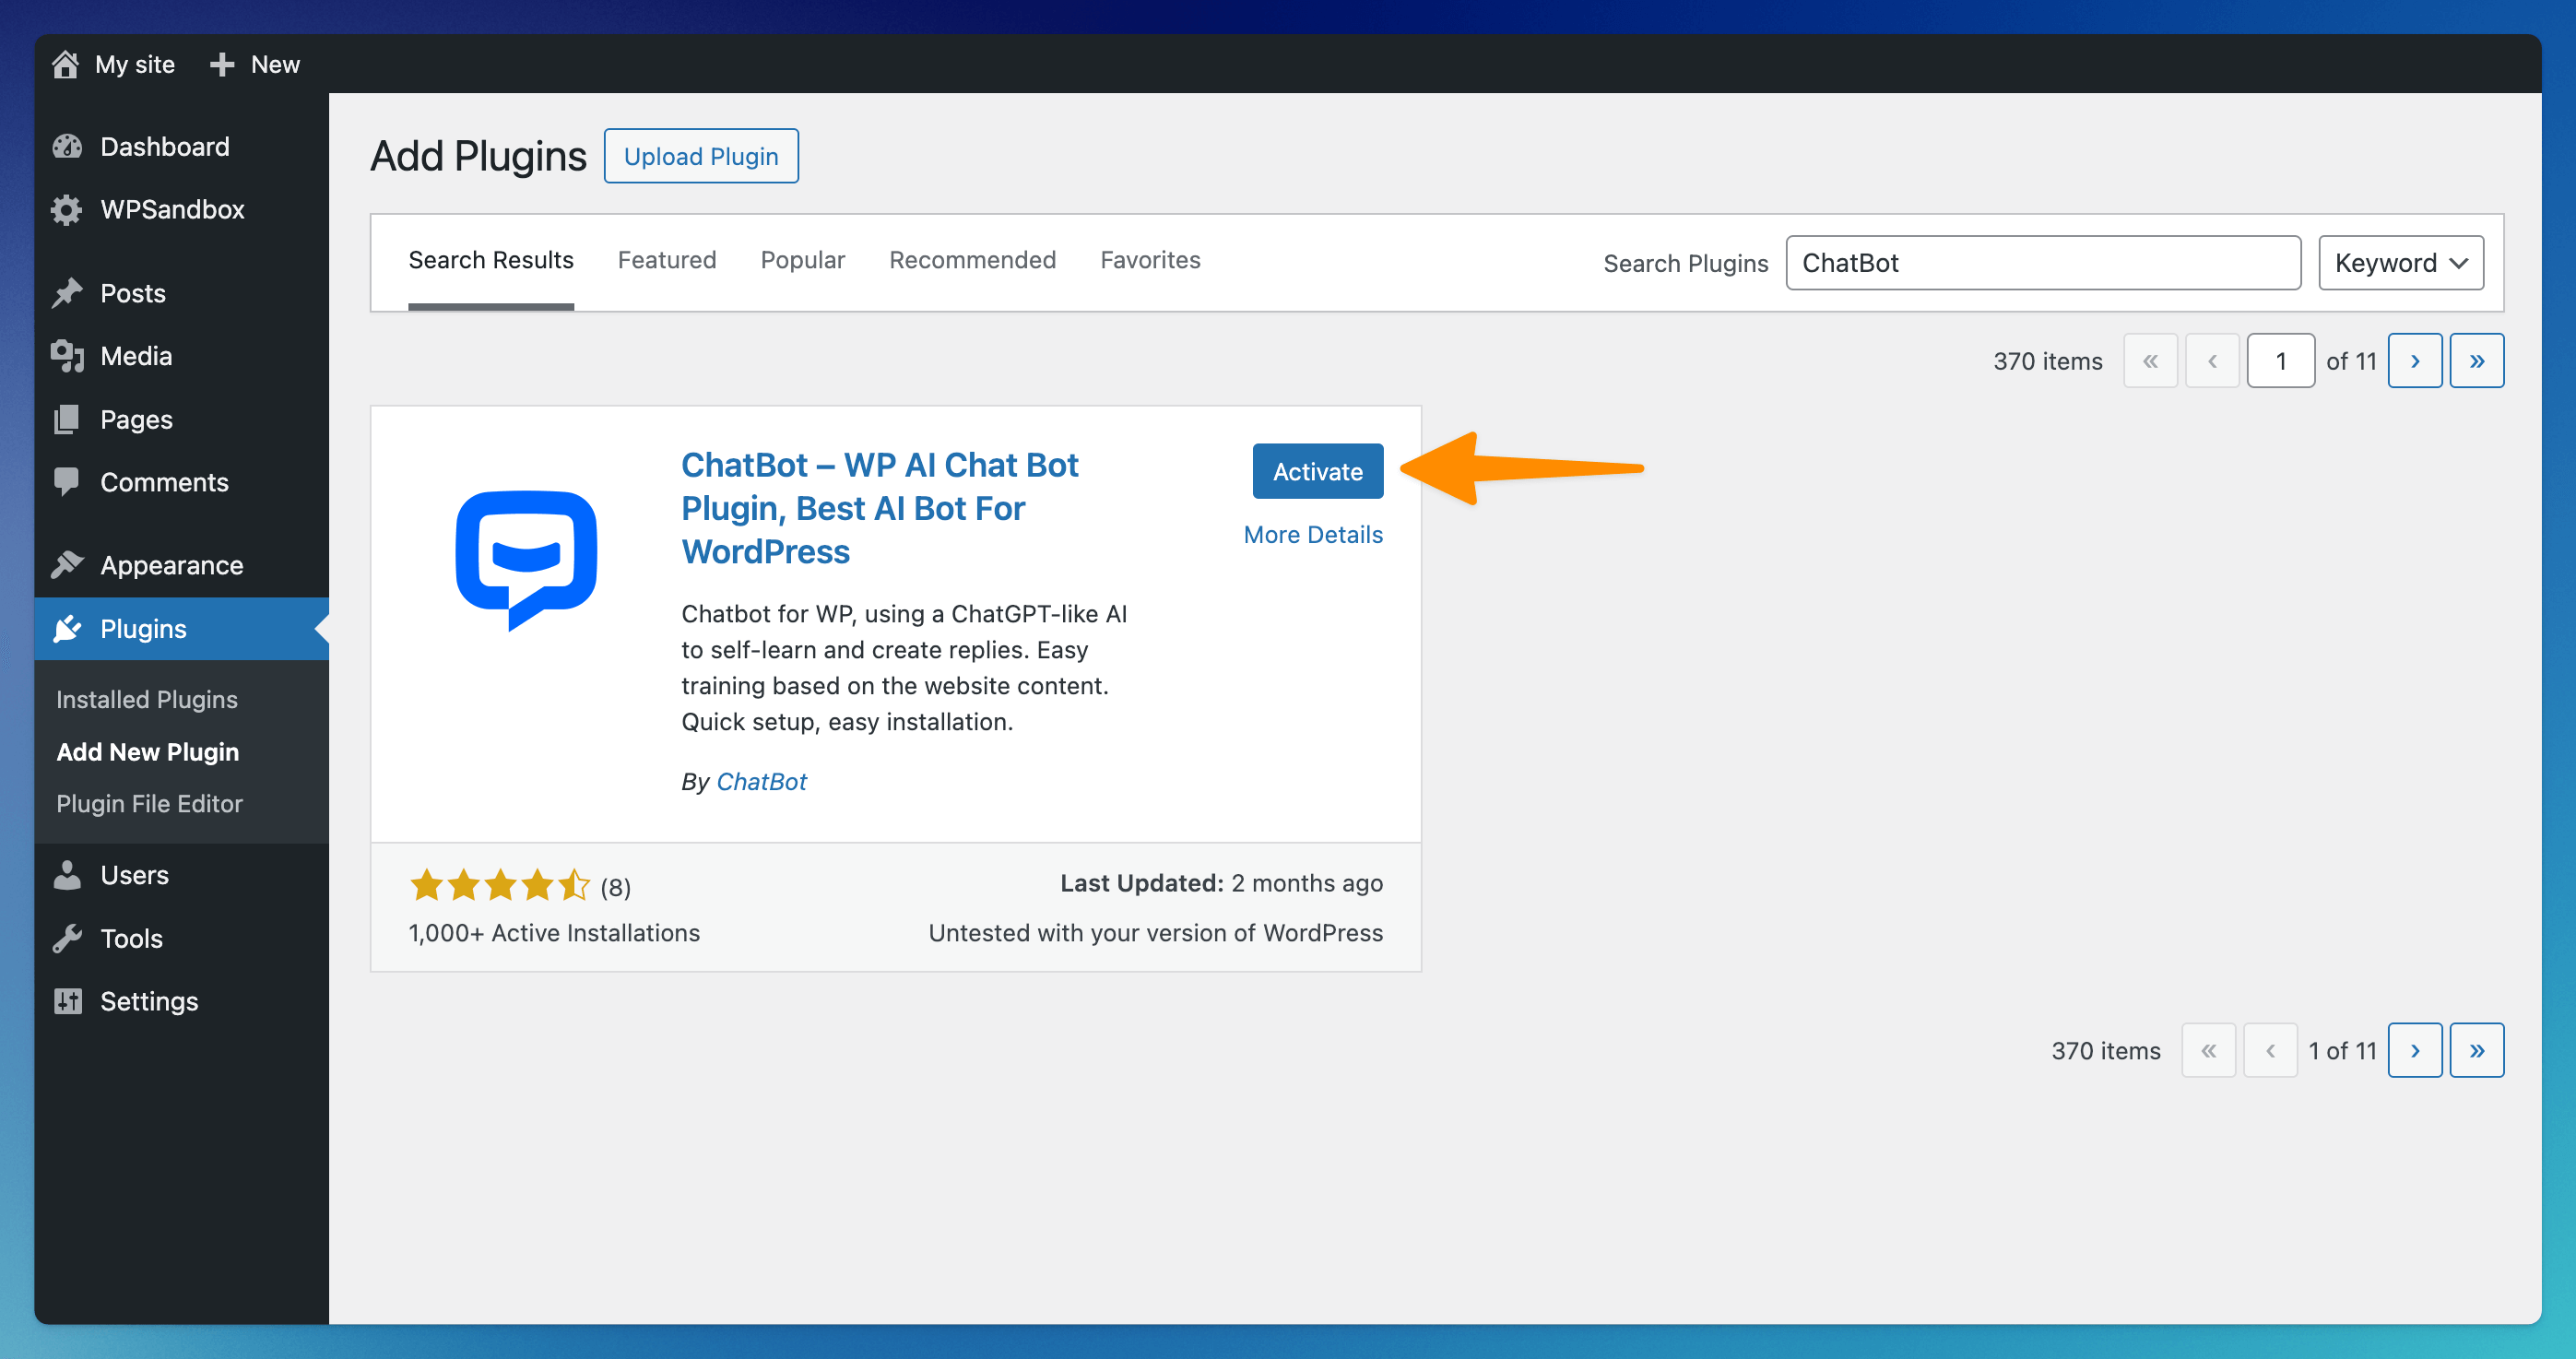
Once the plugin is installed, click on the Activate button.
-
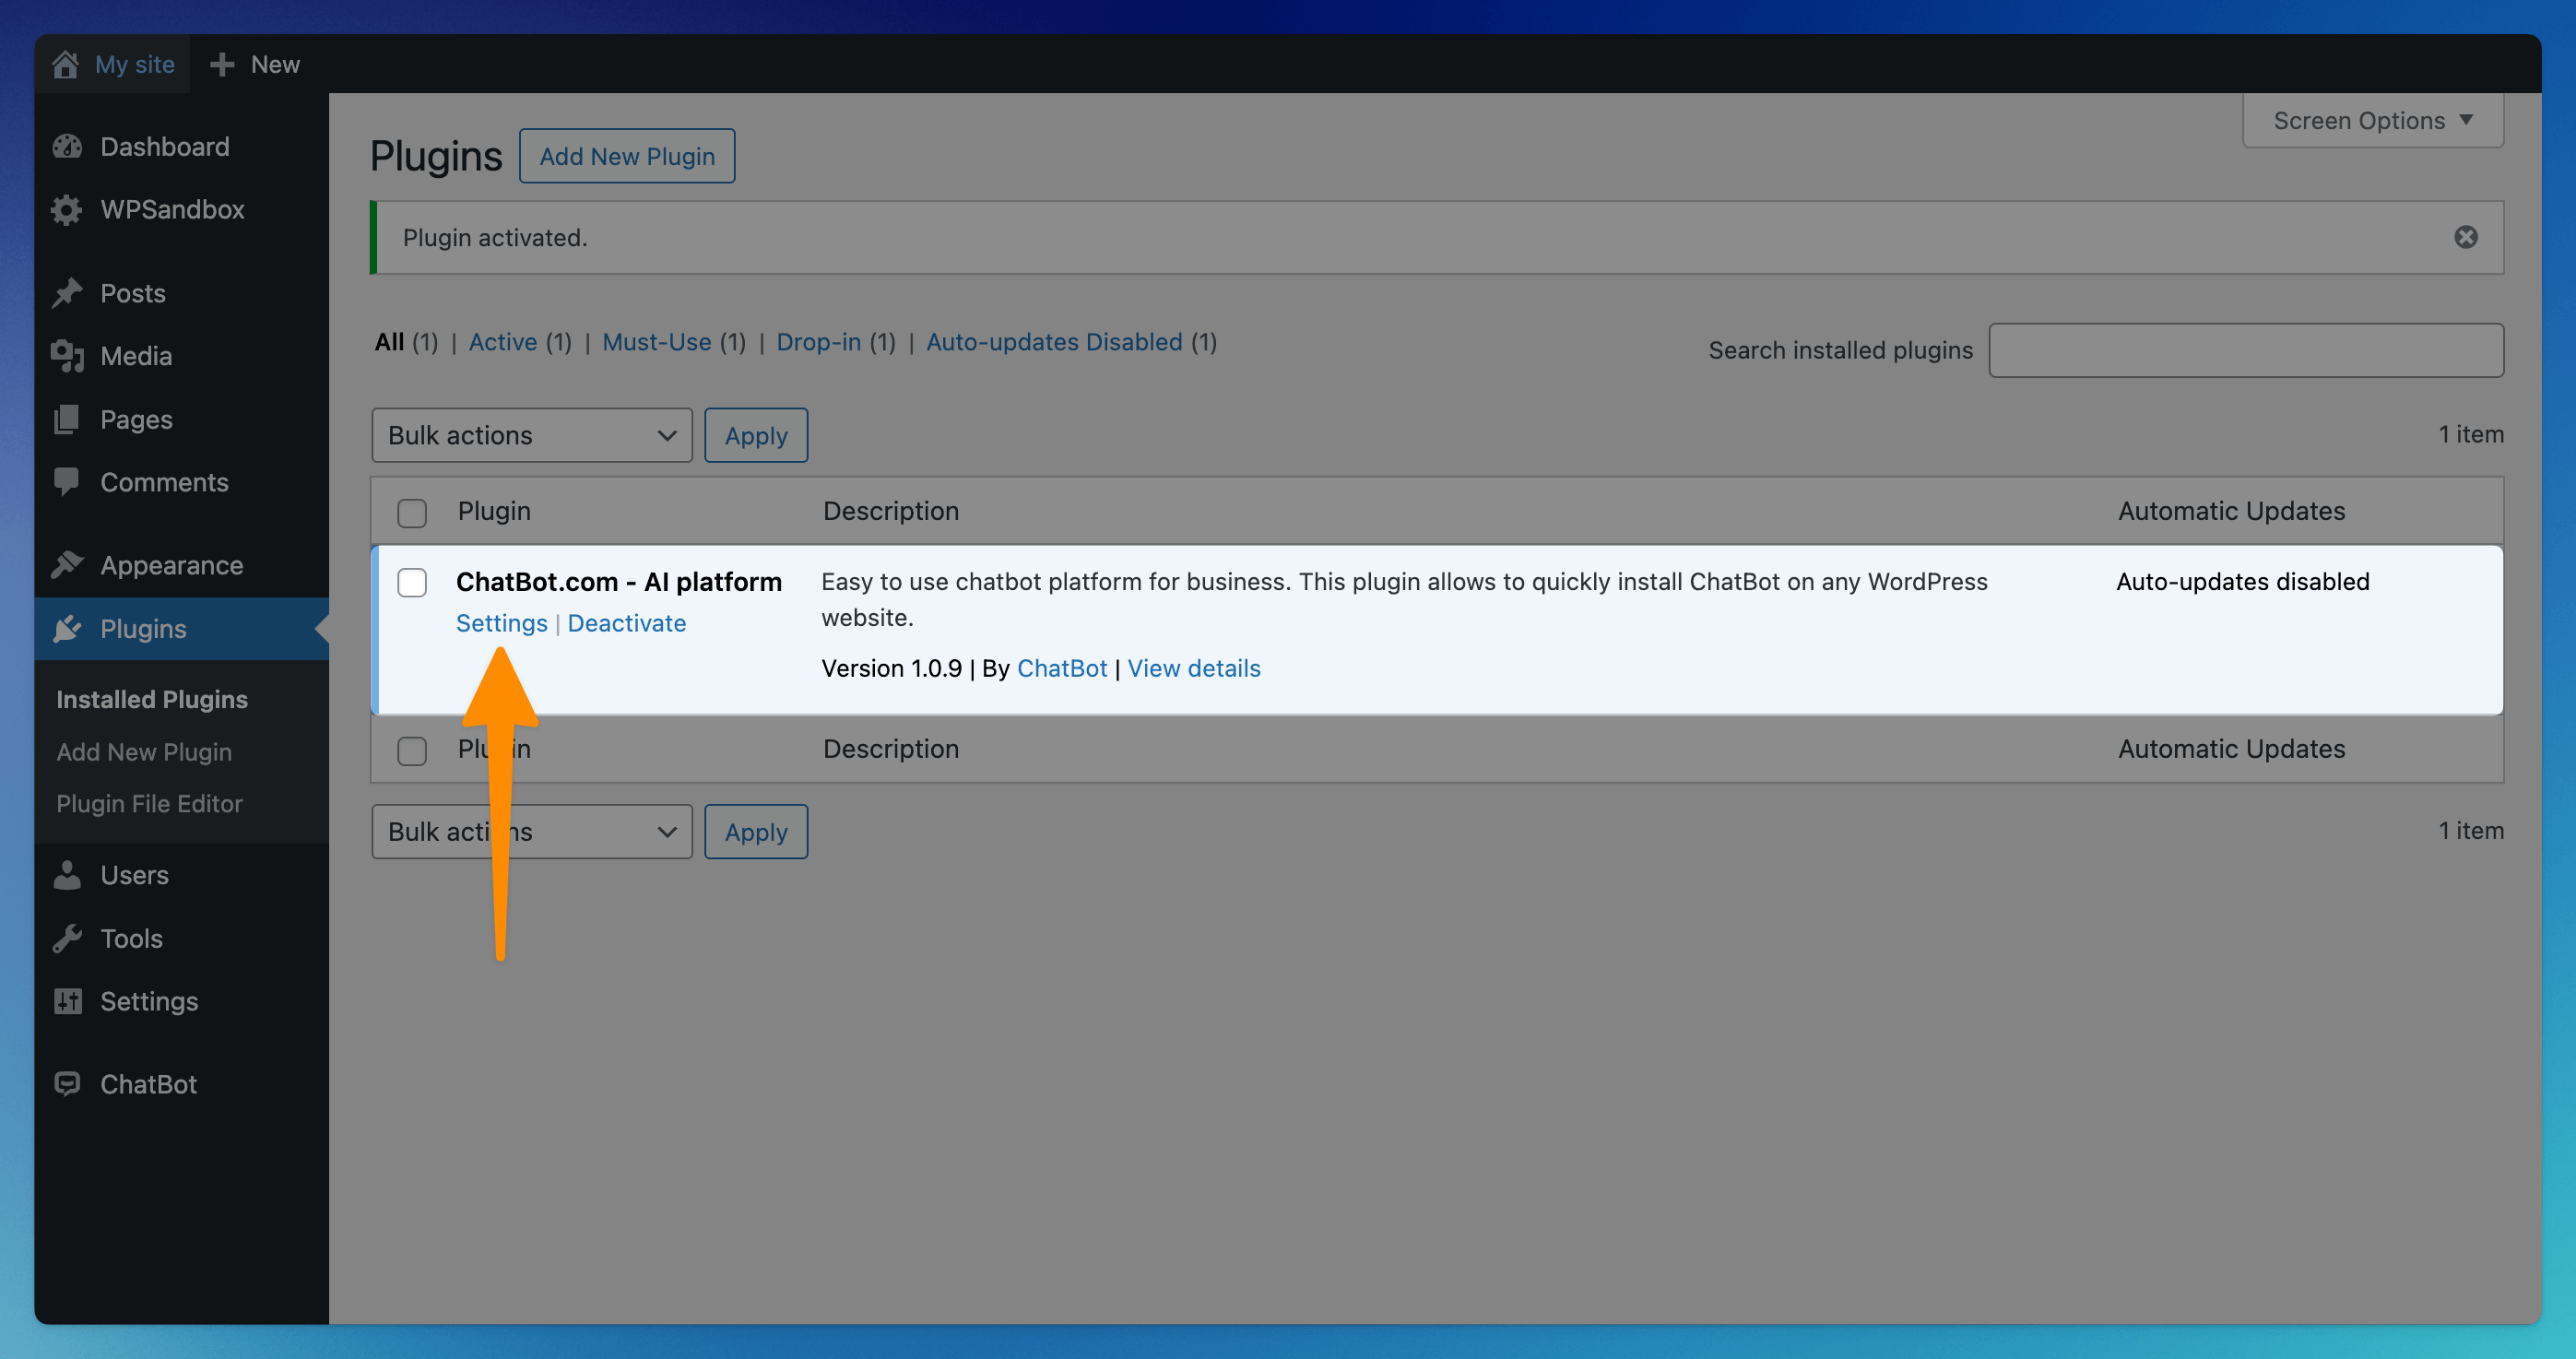
You will be redirected to the Plugins section in your WordPress. Click on the Settings button available under the ChatBot.com plugin.
-
On the next page, click on the Connect account button. If you’ve already signed up, you will be logged in automatically. If you’re not logged in to ChatBot, you can log in or create a new account.

-
Almost ready! Select the bot you will use on your website (1). You can also decide whether your widget should be hidden on mobile or for guests. After that, click the Add to your Site button (2) to finish the installation.

-
Done! Your bot should now be visible on your WordPress site. You can always come back to the plugin settings page to manage the integration.
Read more:
